Friday, December 18, 2020

Video: Four Winter-Themed Container Vignettes

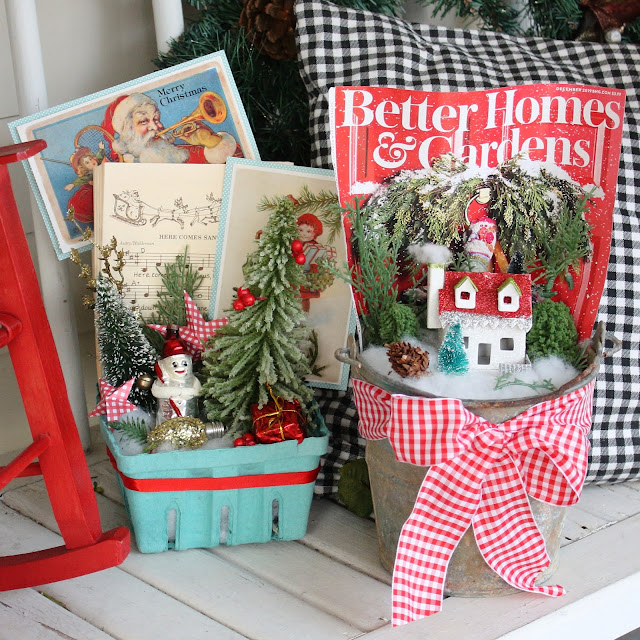
I just uploaded my first video--with sound--on IGTV! In this short video, I share details about how I put together these 4 fun, easy winter-themed container vignettes using items that I already had at home. 


I had so much fun creating these, and I hope that this video inspires you to create some seasonal vignettes of your own! 


These container vignettes are a great size to place on a bookshelf, on an end table or nightstand, or next to the sink in the powder room. 


At the end of the season, you can either store them as-is, or take them apart, store the elements, and enjoy the fun of creating new ones next year! 

Want all of the details? You can see the short video here. I also shared it on my Facebook page, if you prefer that platform. Have fun!

Saturday, February 23, 2019

Marie Kondo's Netflix Series: Thoughts on Minimalism and Magic

A Different Kind of Home Improvement Show

Given that I work in the field of home improvement, one might expect that I watch lots of home improvement shows, but the truth is that I primarily watch HGTV while sitting in the dentist's chair!  Even so, when I learned that Marie Kondo had a Netflix series, "Tidying Up With Marie Kondo", I looked forward to watching it.  I read Marie Kondo's book, The Life Changing Magic of Tidying Up, when it first came out and anticipated that the show would be interesting as well.

In the Netflix series, Kondo guides 8 households through her unique KonMari Method to pare down their possessions one category at a time in a sequential order.  Her five sequential categories are:

  • Clothing
  • Books 
  • Papers
  • Komono (Miscellaneous Items)
  • Sentimental Items

The KonMari Method involves piling all possessions from within one category into a single location and then picking up each item from the pile and deciding whether the item "sparks joy".  Items that "spark joy" remain in the home and are stored in an orderly way; items that do not are thanked for their service and discarded/donated.

Kondo's show captured my attention for exactly the same reason that traditional design shows often don't: it focused on how homeowners feel in their homes rather than just on the aesthetic perfection of the finished space.  As this NPR segment pointed out, Kondo's show merges the genre of home improvement television with a new angle: "self-care culture".  

Though each episode of "Tidying Up" included decluttered "after" room photos, the real "after" was the improved emotional state of the homeowners.  They smiled and laughed more.  They wore brighter colors.  They just seemed...happy.

Watching the series, I was reminded of my wonderful Italian grandma, who used to love watching "Wheel of Fortune".  Whenever someone won, she'd celebrate with them, exclaiming, "God bless!  Looka how happy she is!"  As a viewer of "Tidying Up", I had a similar, "Looka how happy" reaction.   I enjoyed seeing homeowners feeling better in their homes, much as I do with my clients in their homes. 


Is Marie Kondo's Netflix Series About Minimalism?

Many journalists have described Marie Kondo as a minimalist, but I think that's an oversimplification.  She supports approaching ones possessions and home with mindfulness, intentionality, and gratitude.   In both her book and her show, Kondo's focus is less on discarding and more on leaning into joy.  To use an art analogy, the emphasis is on the positive space rather than just the negative space.  The emphasis is on celebrating and respecting what is there rather than what is not there.

When Mario, a homeowner in episode 7 of the Netflix series, whittles his sneaker collection from 160 pairs down to "below 45" pairs,  Kondo steps into his space and declares the change to be "phenomenal".  What kind of minimalist would endorse owning 45 pairs of...anything?  The homeowners featured in "Tidying Up" still have treasured collections and plenty of "stuff" in the after pictures, but they are also visibly relieved after paring down.

There's a Finnish proverb that says, "Happiness is a place between too little and too much."  I think "Tidying Up" shows us the homeowners with their radiant "after" smiles resting in the sweet spot of "just enough", which varies from person to person.  It's not about minimalism per se, but about finding that happy balance in the middle and respecting and appreciating one's own possessions. 


Will Marie Kondo's Method Work Magic For Everyone?

I think that many people can find some element that is useful or helpful in the KonMari method--for example, the wonderfully simple concept of exploring whether an object "sparks joy" as a prerequisite for keeping it.  Kondo's innovative folding method--storing folded items in drawers horizontally rather than vertically--could also be a game changer for many, as it allows all contents to be viewed at once.  But as I watched the series, I thought about some of my adult clients with ADHD and wondered whether the sequential, time-intensive, "marathon" decluttering approach would work for them in their homes.

In a 2017 post about Kondo's book, ADHD coach Dana Rayburn expressed skepticism about whether the method would be realistic for adults with ADHD.  She wrote, "Every card-carrying ADHD adult I know would gather all the books in a pile. Get bored and go do something else.  The pile of books would remain in the middle of the floor for months."

Kondo's suggestion that homeowners hold each object to determine whether it sparks joy also differs from an observation made by Judith Kolberg in her book, Conquering Chronic Disorganization.  In her book, Kolberg, founder of the National Study Group on Chronic Disorganization (now called the Institute for Challenging Disorganization) describes a phenomenon that she calls "kinetic sympathy" whereby individuals are more likely to choose to keep an object if they physically touch it (as opposed to having another person hold up an item for their appraisal).  She writes, "Lacking formal training in psychology, I am at a loss to explain it, but it is clear that touching a thing can set off an emotional response for chronically disorganized people."  I have witnessed this in my work with clients as well, so this may be helpful to keep in mind for homeowners who struggle with discarding.


Despite these limitations of the KonMari method, I recommend the Netflix series and feel that it offers some valuable tools and insights that many viewers can successfully apply in their own homes. 

This post contains Amazon Affiliate Links.


Wednesday, December 19, 2018

3 Easy Christmas Crafts To Make With Kids


Here are three easy, green, kid-friendly Christmas crafts that I've made with my daughter over the years.  All three utilize repurposed / recycled / upcycled materials.

#1: Christmas Trees Made from Painted Paper Party Hats

painted paper party hat Christmas tree easy craft for kids

Do you enjoy wearing paper party hats?  Of course you don't!  Nobody does!  Their elastic strings are always too tight, and they bear an unfortunate resemblance to dunce caps.  Since they aren't any fun to wear, why not transform them into some darling decorated Christmas trees?

I made these sweet Christmas trees with my daughter when she was a toddler.  We started with paper party hats left over from a birthday party.   First, we punched holes along the bottom edges so we'd have the option of putting a battery powered tea light candle inside.  Next, we painted them with green acrylic craft paint.  This step is easier if you are able to open the hats and lay them flat on a protected surface.  After the paint was dry, we used white glue, glitter, beads, and pom poms to decorate them.  These trees were so simple to make, but when we pull them out every year, they bring back the fun memory.

2. Recycled Tissue Paper Tree Ornament 

Recycled tissue paper Christmas tree ornament craft for kids

Several years ago, I had a group of kids coming over to our house for a playdate and no time to run to the store for craft materials.  After unsuccessfully combing Pinterest for a simple DIY ornament project using materials that I had on hand, I came up with this idea.    

Start by cutting the trees (essentially, triangles with a square trunk attached) out of cereal boxes or similar chipboard boxes.  Punch a hole near the top of each tree.  Have each child tear and wad up small pieces of festive colored tissue paper for his or her tree (this is the best part).  Apply white glue to the printed side of a chipboard tree a little at a time and arrange tissue wads on the glue.  You can glue the tissue wads in rows or "free-form"--there are no rules here!  Gluing the tissue to the printed side of the chipboard leaves the back side plain so that you can write the child's name and the date on it.  (Optional: once dry, add sparkles with glitter or glitter glue.)  Finally, glue a small brown square of chipboard over the trunk and add a ribbon or string at the top for hanging.

3. Glitter-Dipped Light Bulbs

Glitter dipped light bulbs repurpose upcycle reuse craft

Here's a great way to upcycle burned out light bulbs from your night lights, candelabras, and Christmas lights.  Use a paintbrush to "paint" glue on the glass portion of the bulb and then sprinkle or roll glitter over the glue.

Once dry, these glamorous, upcycled bulbs are fun to display with greenery in a small dish, tuck into a shadow box, combine with ornaments and glass balls as vase filler, or arrange with vintage ornaments for a centerpiece.

Merry Christmas!

This post contains Amazon Affiliate Links.


Thursday, December 13, 2018

3 Easy, Upcycled Christmas DIY Projects


Chilly December days at home are the perfect time to try your hand at some simple Christmas DIY projects.  Here are three projects that I have made over the years.  All were made from materials that I already had on hand.

1. DIY Reusable Cloth Gift Bags


After replacing our long, rectangular table with a round one, I found myself with a bright red tablecloth that no longer fit our table.  I'd always been intrigued by the idea of reusable, fabric gift bags, so I decided to cut up the tablecloth to make gift bags for our family to reuse year after year.  They've held up for a decade so far!

Cloth gift bags are simple to make with the help of a sewing machine.  Each bag is essentially a pillowcase with one open end.  I made gift bags in a range of sizes to accommodate different sized gifts.  If you repurpose a tablecloth, you can strategically cut it so that you use the finished edge of the tablecloth for the open end of the pillowcase to save some hemming.  Alternatively, you can use pinking sheers to prevent the open end from fraying. 

To tie the bags closed, I have used tartan plaid ribbon that I already had on hand--similar to this ribbon.  You either can use a separate ribbon to tie each bag closed, or you can use a couple of stitches to attach a ribbon at its center point near the open end of the bag to "marry" the ribbon and the bag.

Gifts wrapped by family members before Christmas are just tucked in cloth bags under the tree; additional empty bags can be left near the tree on Christmas Eve for Santa to fill. 

Wrapping gifts is a breeze--just slide the gift inside, tie with a ribbon, and add a gift tag or a sticker to name the recipient!  Then, at midnight on Christmas Eve, when all of the moms in your local Facebook group are frantically wrapping gifts while posting crying face/glass of wine emojis, you can put up your feet, gaze at the Christmas tree, and indulge in an extra cup of cocoa.

Christmas morning clean up is simple too--no wrestling mountains of wrapping paper into the recycle bin.  Just fold up the bags, and you're finished!  

2. DIY Vintage Postcard Window


The mullions on an old window offer an easy framework for displaying vintage Christmas postcards (or your favorite Christmas cards from past years) on a mantel or over a sideboard.  Old windows can often be found at your local Habitat for Humanity Restore.  Simply attach the cards to the window with rolled tape.  If you don't have a collection of favorite cards, The Graphics Fairy offers fun, free, printable vintage French Christmas postcards here.  You can also order books or sets of reproduction vintage Christmas postcards, such as this set below, offered by Amazon:


3. DIY Gift Garland


I was inspired to make this easy garland after a stylist used a similar garland in a photo in the Pottery Barn catalog many years ago.  Wrap small gift boxes with scraps of wrapping paper or fabric and tie with pretty ribbons, and then string all of them onto a single ribbon to hang as a garland.  Tip: if you don't have enough little boxes, the lids and bases of jewelry boxes can be wrapped separately to stretch your box supply.  These gift garlands are darling draped across a mirror, mantel, or armoire.  They also make cute props for Christmas portraits.

Happy crafting!

This post contains Amazon Affiliate Links.


Tuesday, September 5, 2017

Easy DIY Farmhouse Centerpiece

Easy DIY Rustic Farmhouse Centerpiece Using Ball Jars from The Red Chair Blog

There is a mindset that I adopt when I do interior redesign work.  It's more a directive than a mindset, really: I assume that I already have what I need.  I could write a lot about this mindset and how it relates to bigger issues like consumerism and minimalism and spirituality and contentment, but for the purpose of today's post, all I need to say is that this simple directive always pushes me to flex my creative muscles and find solutions to problems.  Somehow in my creative work, whenever I assume that I already have what I need, I'm right!

Inspirational quote from The Red Chair Blog Assume that you already have what you need

When it was time to photograph this kitchen for my website, the long farmhouse table was begging for a long farmhouse centerpiece.  More specifically, a Joanna Gaines "Fixer Upper" style long, rustic, reclaimed wood box centerpiece.

White farmhouse kitchen with walls in Sherwin Williams Comfort Gray and floors in Pergo Haley Oak

I didn't have a long, rustic, reclaimed wooden box centerpiece--nor did I feel inspired to build one--but I did have a single, rustic board.  And a shelf full of blue Heritage Collection Ball jars.  And access to a North Carolina backyard bursting with mint.  And so a formula presented itself:

Wooden board + Jars + Filler= Instant Farmhouse Centerpiece  

The centerpiece pictured here is shown on an 8 foot long farm table.  I'll share more details about this room in a future post.  To assemble the centerpiece, I started with a piece of pallet wood measuring approximately 5" x 40" and centered it on the table.  A longer, wider board would have been ideal, but I was assuming that I already had what I needed!  I filled ten aqua blue Ball jars half full of water, lined them up on top of the board, and added fresh-cut mint to each one.
Easy Joanna Gaines style Rustic DIY Farmhouse centerpiece using ball jars from The Red Chair Blog


The Ball jars are sold on Amazon in sets of 6, so two full sets are pictured here.  If you look carefully, you can spot the final two jars serving as drinking glasses on the kitchen island.  As a side note, the jars are perfect for lemonade, iced tea, or even smoothies, as their wide mouths make them easy to clean.

If you don't own blue Ball jars, scout your house assuming that you already have exactly what you need!  Clear jars would work well too; check your recycle bin for peanut butter jars, pickle jars, or jam jars.  You could also substitute a row of short drinking glasses.  Even tin cans with the labels removed could work.  Filler can be flowers, herbs, or votive candles for a different look.

Also pictured in this tablescape are vintage Libbey Duratuff Gibraltar glass goblets in a light green color called "Spanish Green".  These vintage glasses can usually be found on Etsy.  A clear glass version of the same product can be found on Amazon here.  The white dishes are Pfaltzgraff Filigree.  The woven cotton turquoise placemats were made by Windham Weavers / Homer Laughlin (RN# 84914).

The key to making this centerpiece look intentional is repetition; whatever vessel you choose to use, use a lot of them for visual impact!

This post contains Amazon Affiliate links.

Tuesday, February 14, 2017

Feng Shui Tips for Love and Romance

Feng shui tips for love and romance from The Red Chair Blog

Feng shui is the ancient Chinese art and science of arranging one's environment to be in harmony with nature's energy.  Whether you are single or in a relationship,Valentine's Day is a great day to spend a few minutes improving the feng shui of the "marriage / relationship" corner of your master bedroom.

To start, locate the marriage corner of your room. Stand in the doorway so that you're facing into the room. The far right corner of the room is your marriage corner:

How to find the marriage relationship corner feng shui The Red Chair BlogTake a look at your marriage corner.  Is it piled to the ceiling with dirty laundry? Is it home to your video collection of every episode of "Divorce Court" that ever aired? Is it where you showcase your prized prickly cactus or your pet piranha, "Jaws"?  Or maybe it holds accidental symbols of solitude and unrequited love, such as this sad little perpetually-puckering figurine?

Kissing angel image from The Red Chair Blog

I once worked with a single client who discovered, much to her dismay, that her marriage corner held two overflowing garbage cans!  Another client laughingly observed that the display shelf in her marriage corner had been home to the cremated remains of her pets.  She quipped, "You mean I'm not supposed to have dead animals in my marriage corner?!"

Think about the symbolism of the objects in this corner of the room.  If an object doesn't symbolize love, partnership, and affection--and your current relationship--it doesn't belong in the marriage corner!

So what does belong in your marriage corner?  Here are some suggestions:
  • Photos of you and your beloved together.  Wedding photos are wonderful here!
  • Thriving, growing houseplants
  • Fresh flowers 
  • Your wedding cake topper  (But if you saved and dried your bridal bouquet, display it elsewhere; dried flowers are a feng shui "no-no" because they are technically...dead!)
  • Candles (pairs are best)
  • Framed love letters or framed quotes about love
  • Pairs that represent love to you (for example, two "lovebirds")
  • Heart-shaped objects
  • Your marriage certificate or framed wedding invitation
The colors that are said to enhance this area are red, white, and pink. What a coincidence: Valentine colors! Pink can be tough to incorporate into most of today's color schemes, but red and white are good candidates. You may even be able to repurpose a few of your Valentine's Day decorations or cards here year-round. 

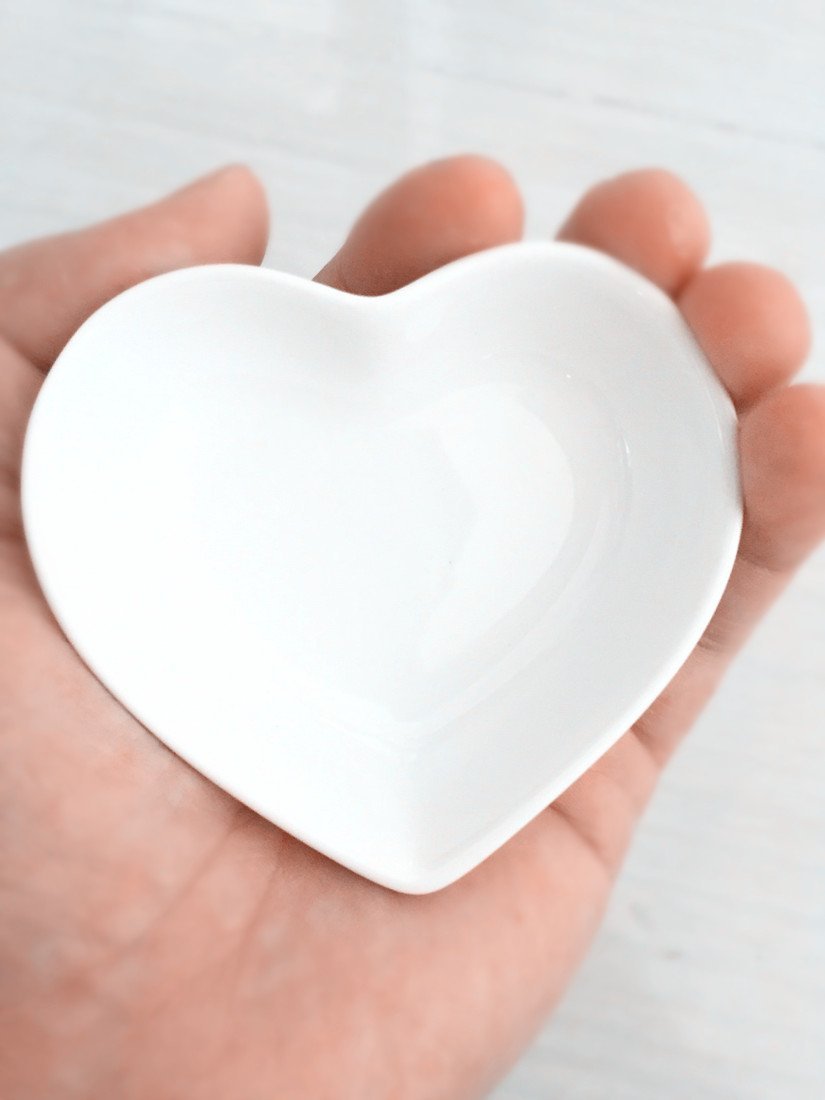
This set of 2 Elufly porcelain mini heart dishes is a textbook example of what to display in your marriage corner.  This affordable set gets points in three categories: it's a pair, it's white, and it's also heart-shaped!

Heart dishes are good feng shui for the marriage corner of your bedroom The Red Chair Blog

A sweet heart dish is good romance feng shui The Red Chair Blog

While feng shui-ing the marriage corner is helpful, it's also important to take a step back to assess the master bedroom as a whole from the perspective of whether it can accommodate the needs of just one person or two.  Is the bed wedged into a corner, or are both sides of the bed easily accessible? Are there two nightstands and two table lamps flanking the bed, or only one?

When I work with single clients, I often notice that they have only one nightstand and/or one bedside lamp in the master bedroom.  Sometimes they have stored the second, matching nightstand in the attic or in a closet, explaining that they "don't need it".  I encourage single clients to symbolically make space for a future partner by including a pair of nightstands and a pair of lamps flanking the bed in the master bedroom.

Pairs hold symbolic power in a master bedroom.  But feng shui aside, pairs also add nice visual symmetry, and a pair of lovely, matching lamps can sometimes be the finishing touch that elevates the room to "finished" status.  The two nightstands don't need to be identical, but they should be of similar height, color, and visual weight.  In a small bedroom, a pair of petite dressers can serve as nightstands, eliminating the need for a single larger chest of drawers or a large dresser.

Be creative and have fun! Happy Valentine's Day!

This post contains affiliate links

Tuesday, June 7, 2016

Bicycle Napkin Rings at Steinmart

I recently saw these fun, red bicycle napkin rings on clearance at Steinmart, and I couldn't resist snapping a photo with my phone to share.  Priced at $1.95 each--with additional coupons available--they're a whimsical design surprise for your table, especially if your family loves bikes and bike riding!

Given their cheerful red color, they could be pressed into service for several different holidays too.  Pair them with patriotic place mats for the Fourth of July, or wrap a little sprig of faux holly berries and leaves around the handlebars at Christmas.  When Valentine's Day rolls around (no pun intended), these little bikes can partner with pink and white table linens.

Bicycle napkin rings from Steinmart spotted on The Red Chair Blog

I have a special place in my heart for all things bicycle-related because I rode an older, red "Gypsy Sport" bike as my primary form of transportation all through my undergraduate years.  There were more bikes than people in our CA college town, and the town was designed to be bike-friendly, with abundant bike lanes and bike parking.  Though many bikes were stolen every year, no one ever stole "the Gypsy"!

Friday, June 3, 2016

DIY Small Space Laundry System Revisited

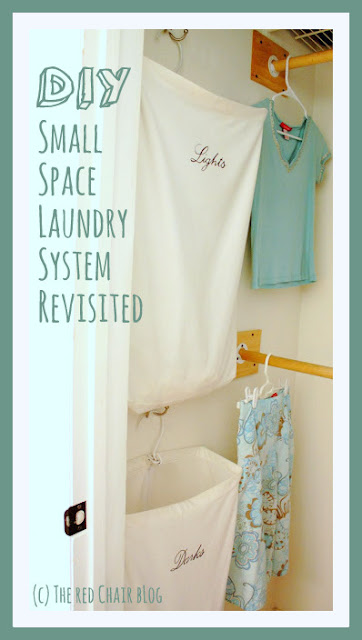
DIY small space laundry system using hanging laundry bags from The Red Chair Blog

In January of 2010, I wrote a post in which I shared my small space laundry solution: hanging two hanging laundry bags on double hooks one above the other on the back of a bathroom door to hold two full loads of dirty laundry without taking up any floor space.  The original post--which includes detailed DIY instructions for painting the bags--can be found here

Over the years, my DIY laundry system post has consistently been one of my top ten most visited posts.  Apparently Don Henley was right: people really do love dirty laundry!  Today, I wanted to circle back to reaffirm my love for these bags.  I'm happy to report that they are still going strong 7+ years after purchase. 

In my former home, I hung the bags one above the other on the back of the bathroom door as seen in these photos from 2010:

DIY small space laundry system using hanging laundry bags The Red Chair Blog storing laundry


Easy DIY small space laundry solution using hanging laundry bags from The Red Chair Blog
The system worked beautifully; the only problem that I noticed over the years was that when both bags were completely full of laundry, they threw off the alignment of the door a bit due to the weight.  This problem corrected itself as soon as the bags were "reset" to empty again.

After moving to a new house that has a bathroom layout without space behind the door, I decided to use drywall anchors to hang the bags on a side wall in my master bedroom closet.  Though the closet is tiny by today's standards--less than 4 feet wide and just over 3 feet deep--the bags fit right in.  The photo below shows placement.  Full disclosure: despite my appreciation of the KonMari Method and my earnest efforts at decluttering, I do in fact own more than one outfit!

Easy DIY laundry storage system using hanging laundry bags from The Red Chair Blog

This photo was taken last summer, but even today, these laundry bags look great and are still sturdy and strong.  In this day of planned obsolescence, it's refreshing to discover products that last.

I love these bags.  They're sturdy, affordable, easy to carry in one hand, and each bag holds a full load of laundry.  The hook at the top of the bag comes in handy for hanging the bag when you are transferring clothes to the washing machine. They're sold plain, but you can easily personalize them as I did in my original post.  The right organizing tools can make all the difference!


This post contains Amazon Affiliate links.